 Skip to content
Rolling joints is a skill that has been around for centuries, and it is still popular today. If you smoke joints regularly, it’s a great way to save money, while allowing you to experiment and customize your cannabis experience.
In this quick read, we’ll explain how to roll a joint step-by-step, first, using a rolling machine and second, by hand. With a little practice and patience, you’ll be a pro soon enough!
How to Roll a Joint Using a Rolling Machine
Step 1: Gather Your Supplies
First, gather your supplies. You’ll need:
Rolling paper
Cannabis flowers
Filter tip or cardboard
A rolling machine
Step 2: Prepare the Cannabis
Next, you’ll need to prepare the cannabis. Joints contain raw cannabis flowers, but you can also add little bits of hash for an extra kick! We strongly recommend using a cannabis grinder to get the flower uniformly chopped up without getting your hands sticky or losing any precious kief. Make sure you remove any stems or seeds, as these can puncture the rolling paper.
Step 3: Load the Rolling Machine
After preparing the cannabis, it’s time to load the rolling machine. Open the machine and place the filter at one end, then add the cannabis evenly on top of the rolling paper. Be careful not to add too much cannabis, or it will be difficult to roll. You can select any rolling paper you like. The Raw Classic Rolling Papers are a great place to start, but if you’re looking for something bigger, we love the Pure Hemp Unbleached 1 1/4 Rolling Papers.
Further reading:
Everything You Need To Know About Rolling Papers
If your filter tips aren’t pre-rolled, you can use a piece of cardboard. Some rolling paper companies actually put filter paper in their packages, but if they don’t, the package itself is the ideal thickness. Up-cycle any piece of cardboard packaging by adding it to your joint rolling kit! Use a pair of scissors to curl the cardboard by running it firmly against the outside or inside of the blade. Then roll it until it fits the joint.
Step 4: Roll the Joint
Once the machine is loaded, it’s time to roll the joint. Close the machine and use your thumbs to roll it back and forth until the cannabis is evenly distributed. Then, use your fingers to gently shape the joint.
Step 5: Seal the Joint
To seal the joint, wet the adhesive strip on the rolling paper with your tongue, and then press it down onto the other end of the paper. You can also use a lighter to dry the adhesive if needed. If you missed a stem and it punctured the rolling paper, no worries! You can tear off a glued section of a rolling paper and stick it overtop. Good as new!
Step 6: Enjoy!
Now that your joint is rolled and sealed, it’s time to enjoy it. Light the end of the joint, and take a puff to make sure it’s drawing properly. Adjust the contents as needed, and enjoy your machine-rolled joint.
Rolling a Joint by Hand
If you don’t have a rolling machine, you can still roll a joint by hand. Here’s how:
Repeat Steps 1 & 2.
Step 3: Prepare the Rolling Paper
A really helpful way to roll a joint by hand is to make a trough for your ground-up cannabis on one side of the paper, like in the image below. This keeps the cannabis contained as you begin to create the cylinder shape.
Image of Creating a Trough For Your Cannabis
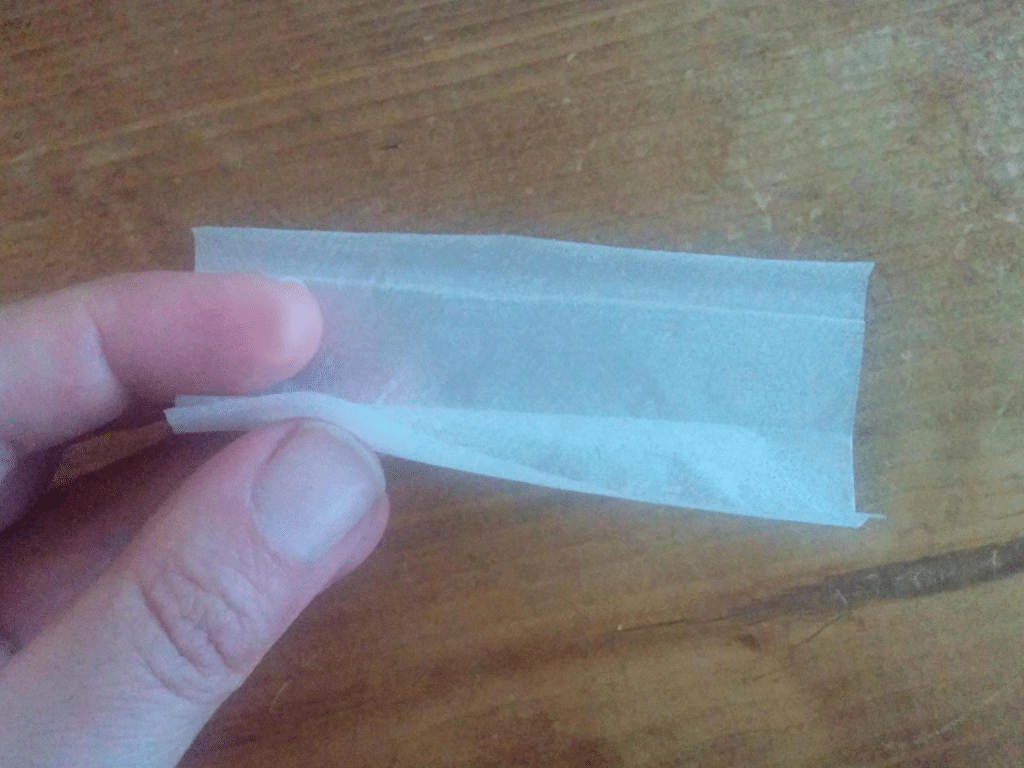
Place the filter at one end of the rolling paper, with about a centimetre sticking out. This will make it easier to roll. If you find it difficult to roll the joint with the filter inside, no need to worry! You can simply roll the joint without the filter to start, saving some space for it at the end. Once your joint is rolled, you can tamp down the weed on that end and fit the filter inside. You may need to cut it to fit.
Step 4: Roll the Joint
Use your fingers to gently shape the cannabis into a cylinder. Use your thumbs and forefingers to roll the paper back and forth until the cannabis is evenly distributed. Then, use your fingers to shape the joint.
Step 5: Seal the Joint
Lick the adhesive strip on the rolling paper, and then press it down onto the other end of the paper. Use your fingers to gently shape the joint again, if needed.
Repeat Step 6: Enjoy!
Rolling the Perfect Joint
Rolling a joint by hand is a bit more challenging than using a rolling machine, but with a bit of practice, you’ll be able to roll a perfect joint in no time. Remember to always smoke responsibly, and be mindful of the health risks associated with combustion.
If you’re looking for a way to remove combustion altogether from your cannabis consumption methods, you might enjoy these articles: